
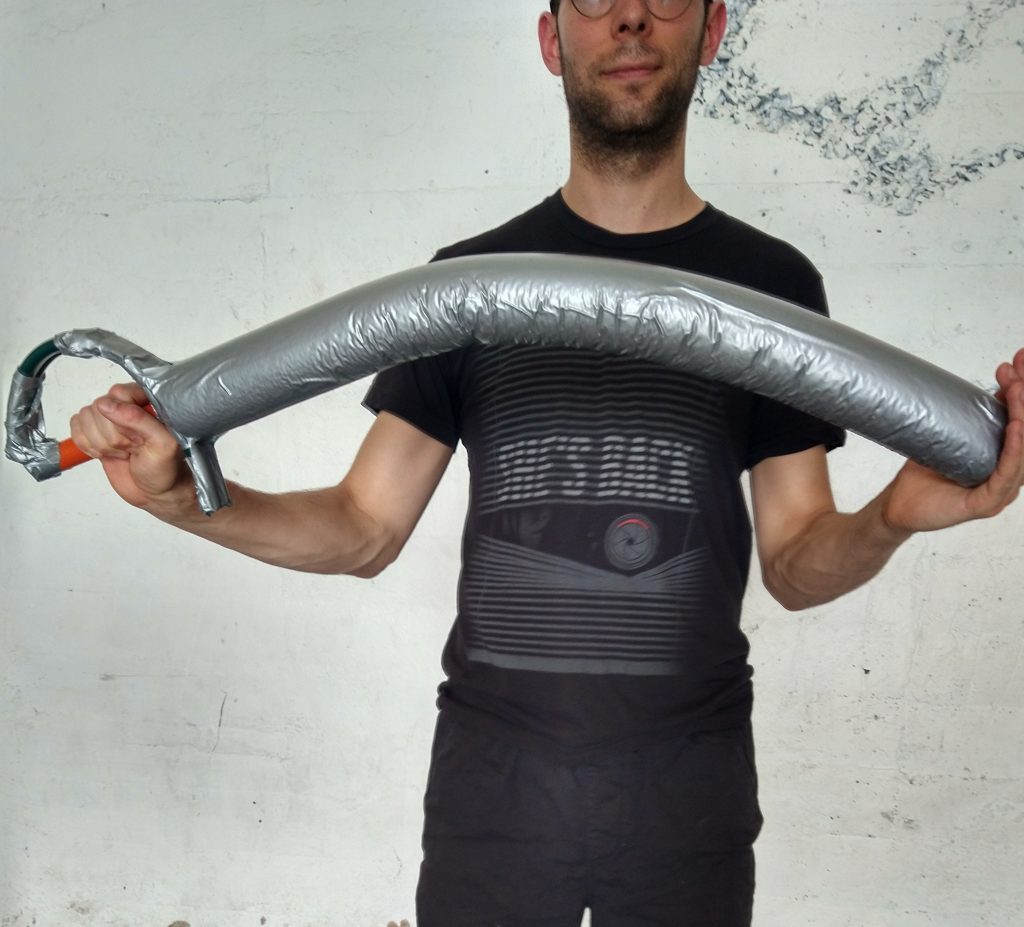
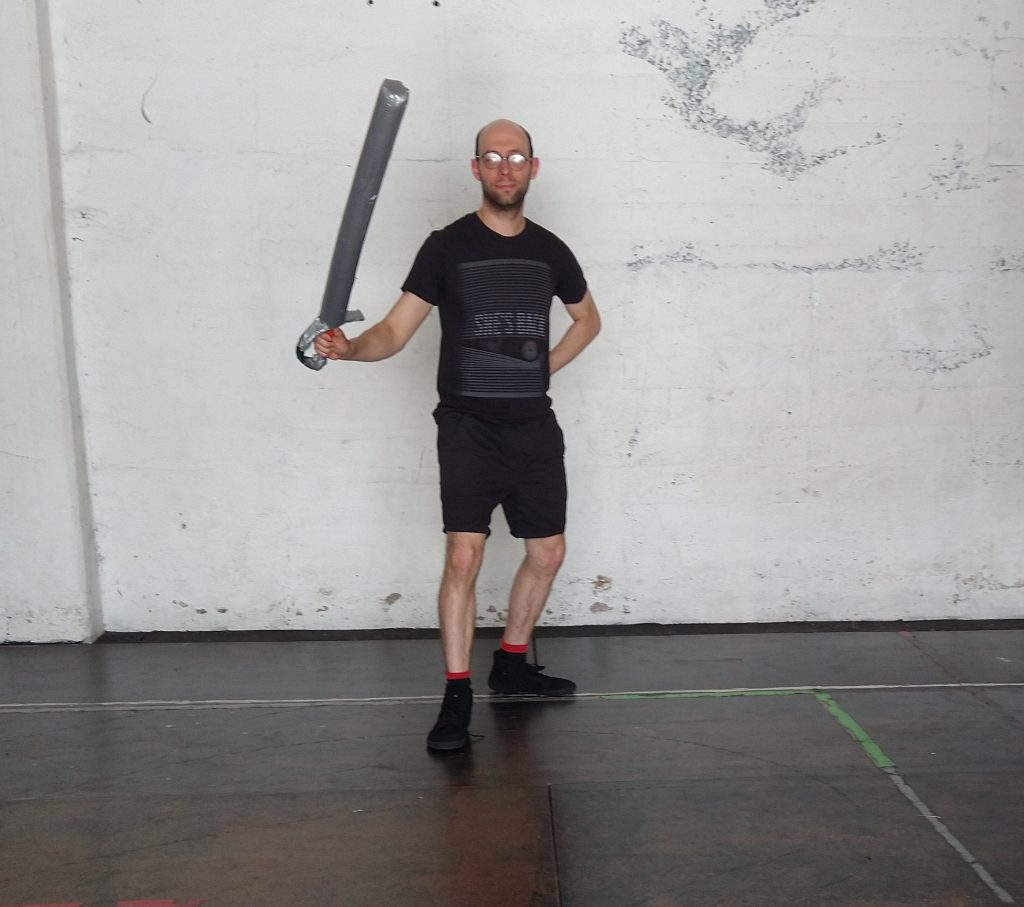
There are lots of different activities that use foam swords (also called boffers) of various kinds. This design is the one I think is best for HEMA. It is cheap, light, soft, flexible, keeps your hands somewhat safer from injury than other designs and still allows you to parry and bind fairly well for a foam sword.
These boffers are for fencing at full speed with low gear and low risk of pain or injury. They handle very similarly to the lightweight metal sabres used at the Olympics, but cost less than $10 in materials to make.
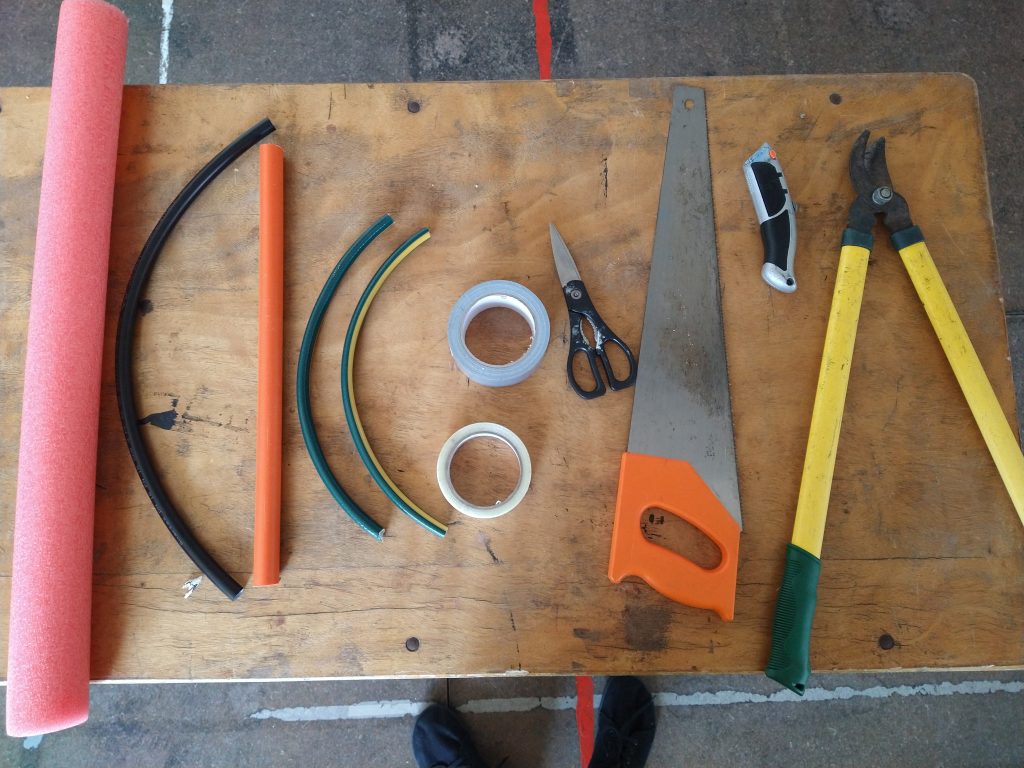
Parts list for an adult size sabre boffer:
Pool noodle with hollow core – cut to 75 cm long
16 mm PEX pipe (typically used for plumbing) – cut to 54 cm long
25mm heavy duty electrical conduit -cut to approx 39 cm long
12 mm garden hose – cut into two pieces each 30 cm long
Cloth duct tape
Fiberglass tape – if you want to save money you can use the cloth duct tape on its own in place of the fiberglass tape.
Parts list for a kid size sabre boffer
(aged 6 – 11 ish, younger kids can use something simpler, lighter, and shorter):
Pool noodle with hollow core – cut to 60 cm long
16 mm PEX pipe – cut to approx 40 cm long
25mm heavy duty electrical conduit – cut to approx 30 cm long
12 mm garden hose – cut into two pieces each 25-30 cm long
Cloth duct tape
Fiberglass tape – if you want to save money you can use the cloth duct tape on its own in place of the fiberglass tape.
Assembly Instructions (adult size boffer)
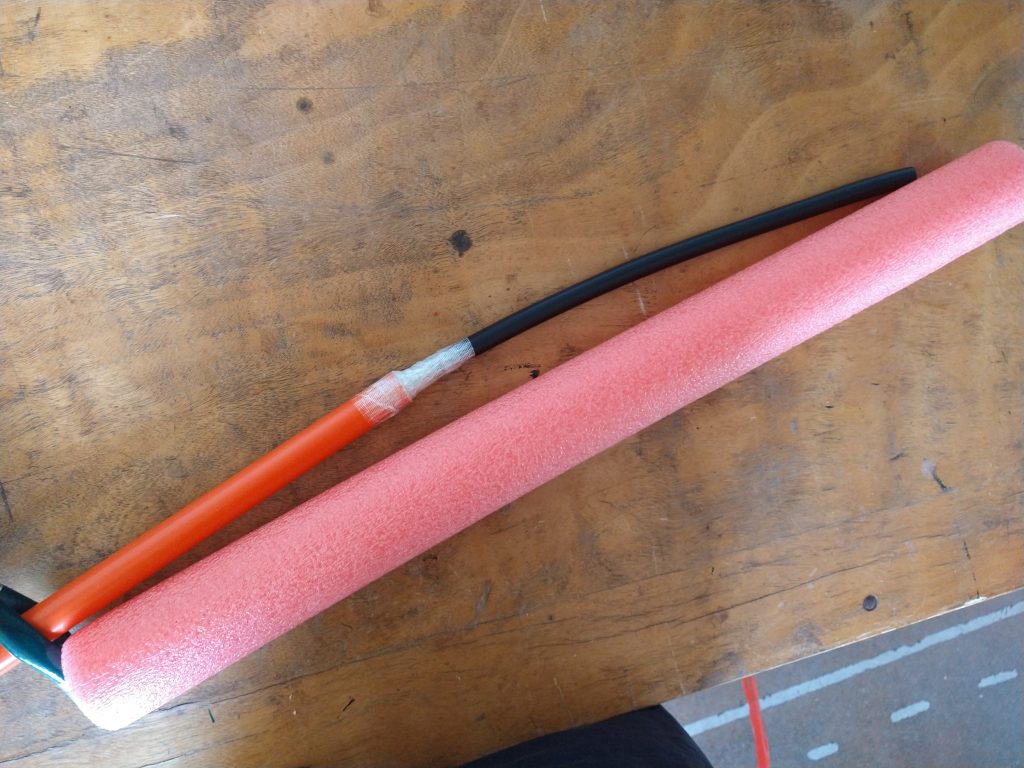
Straighten the PEX pipe (the black flexible pipe) by bending it the opposite way to the way it is already bent. You will need to do this several times as it wants to spring back to its original bend.
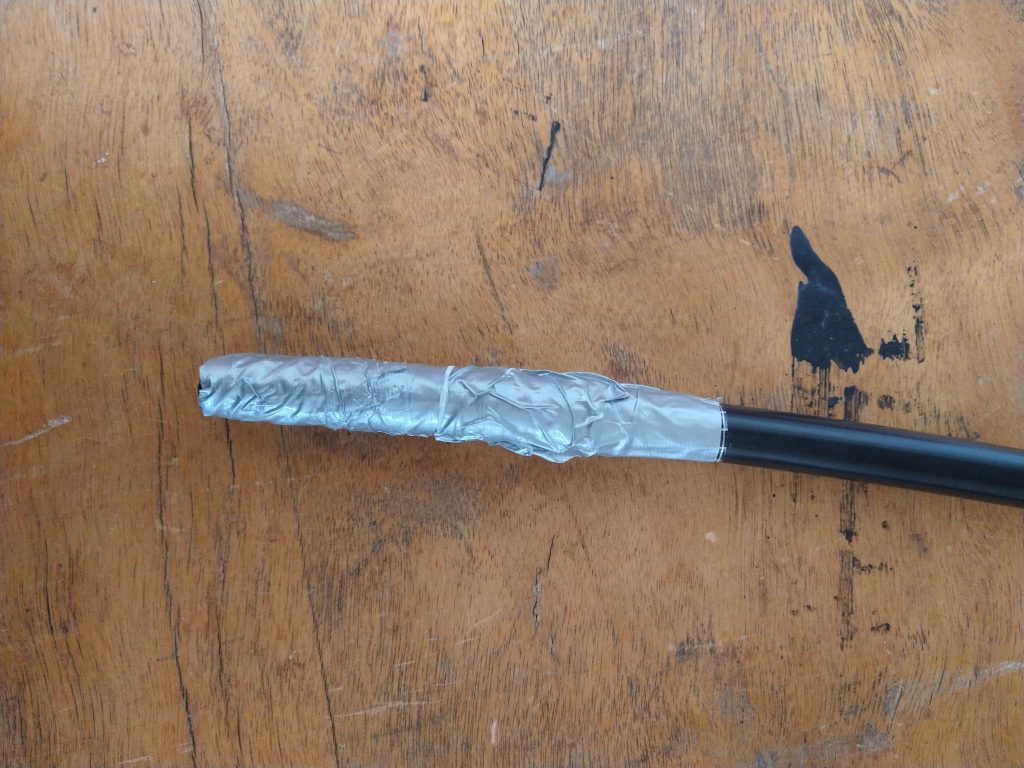
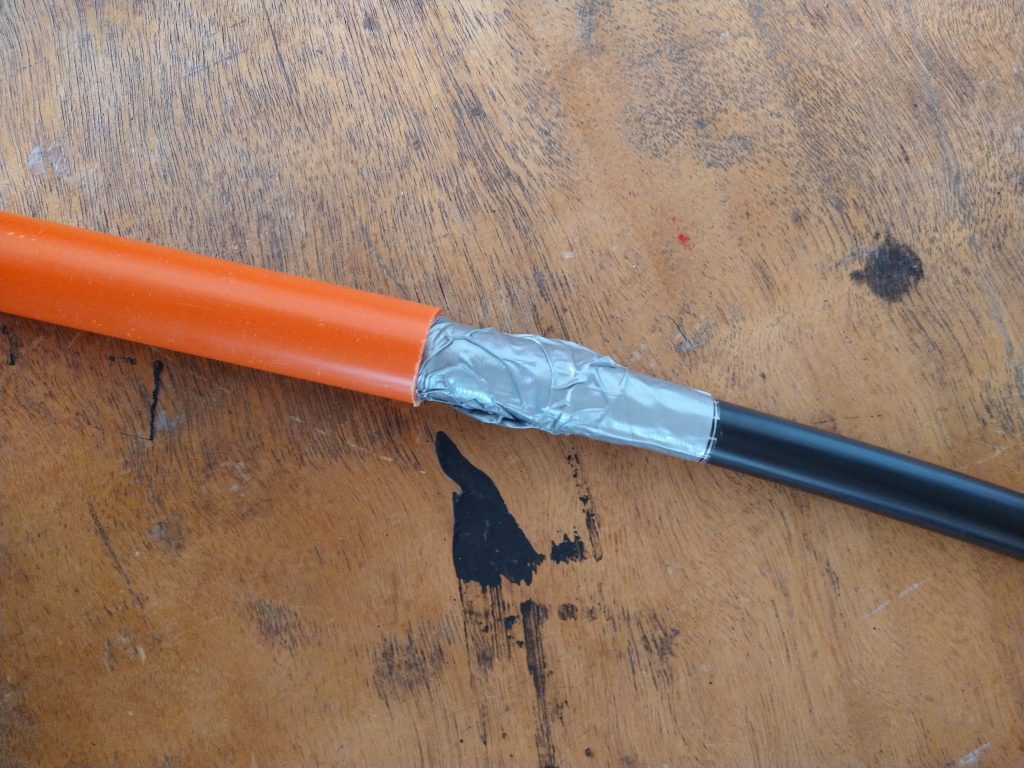
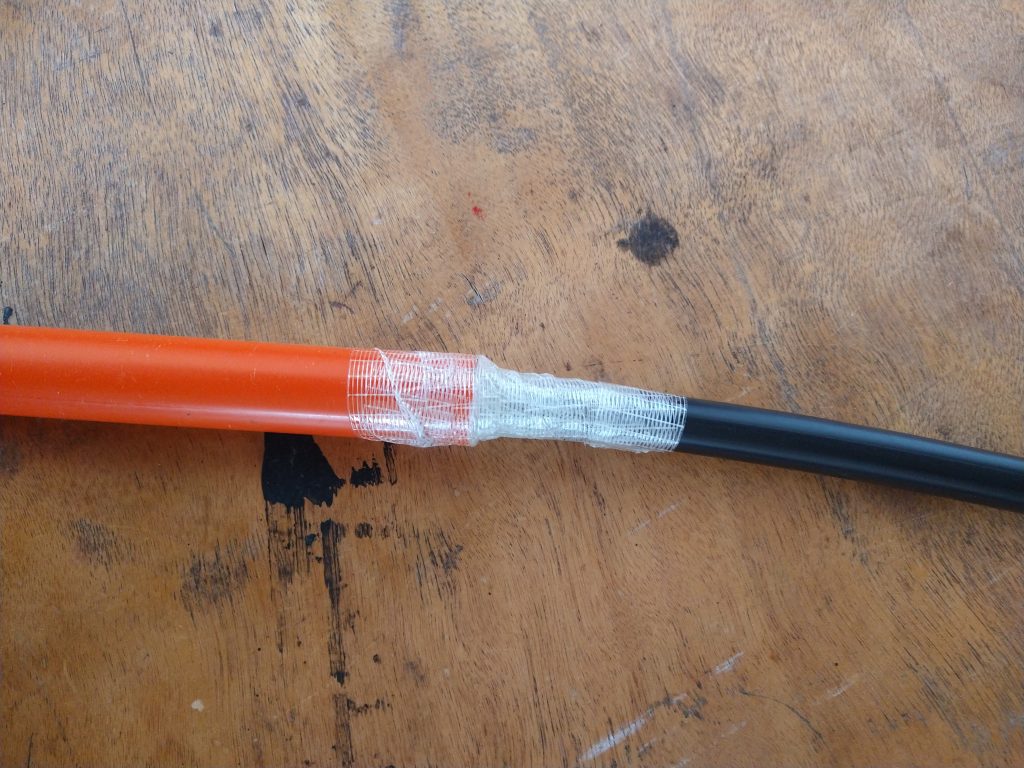
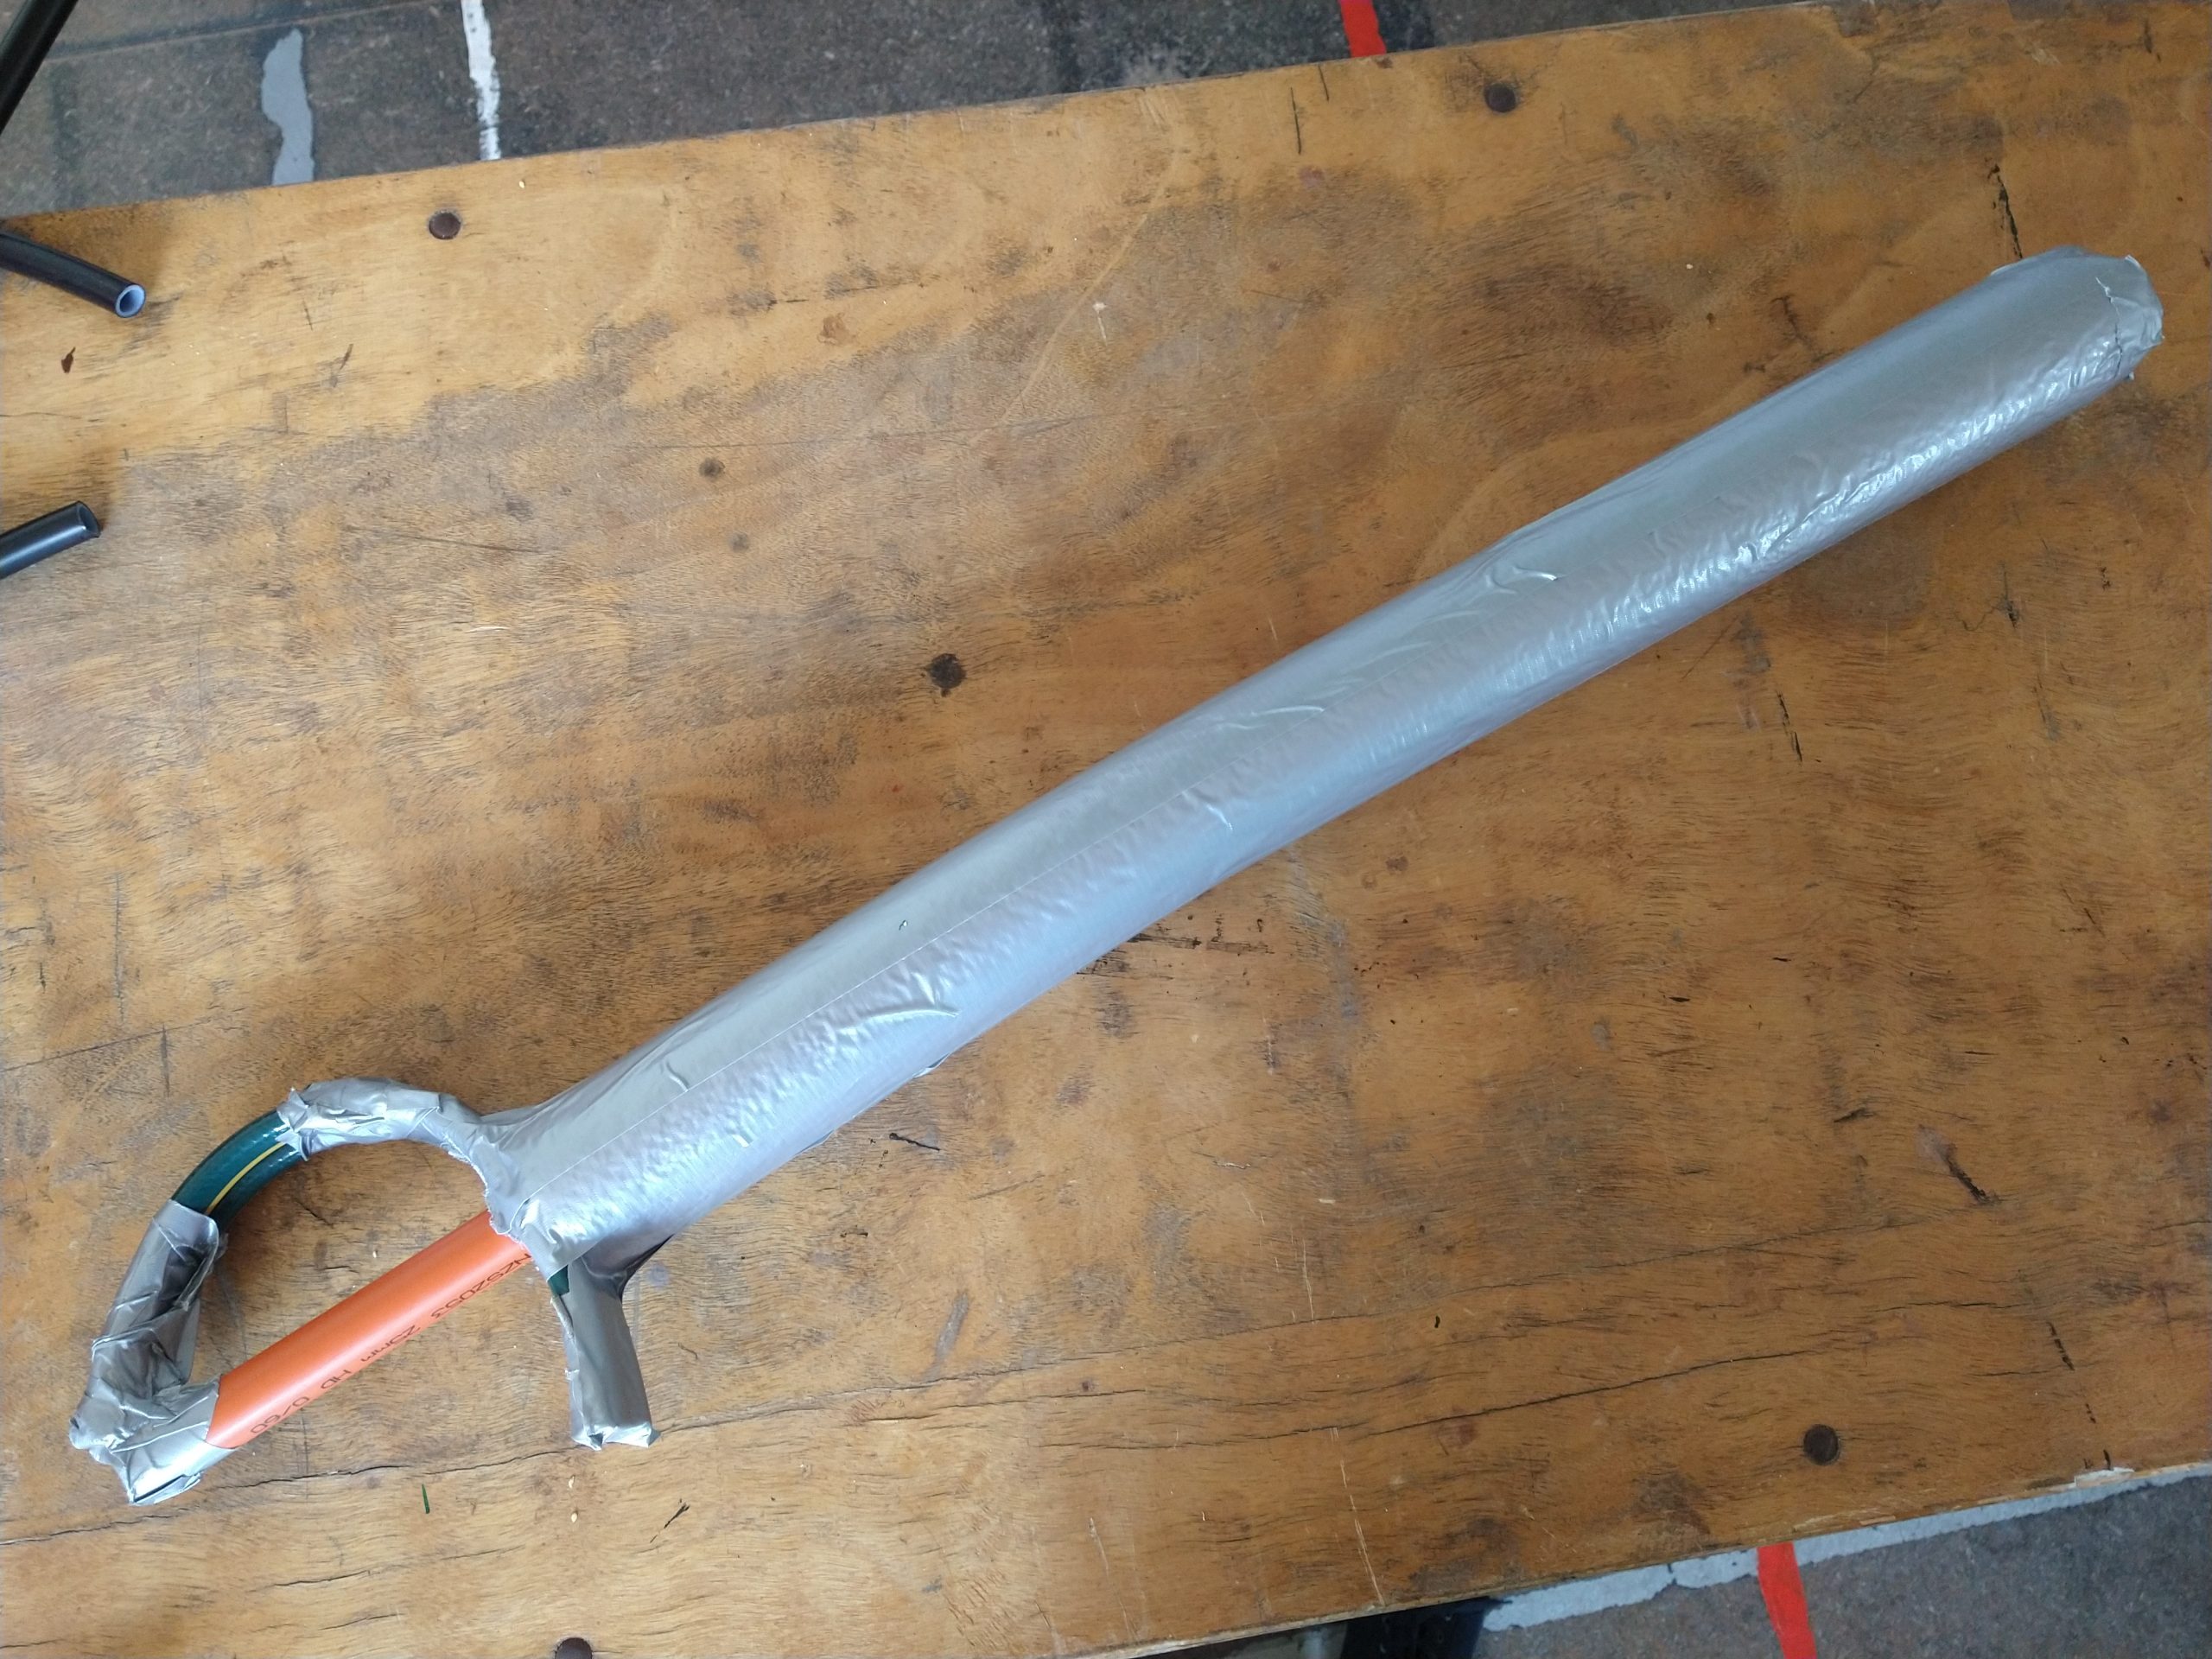
Cover the end of the PEX pipe in cloth tape so that it tightly fits inside the electrical conduit and then tape the electrical conduit and the PEX pipe together with the fiberglass tape. This piece will form the core and the handle of the boffer.
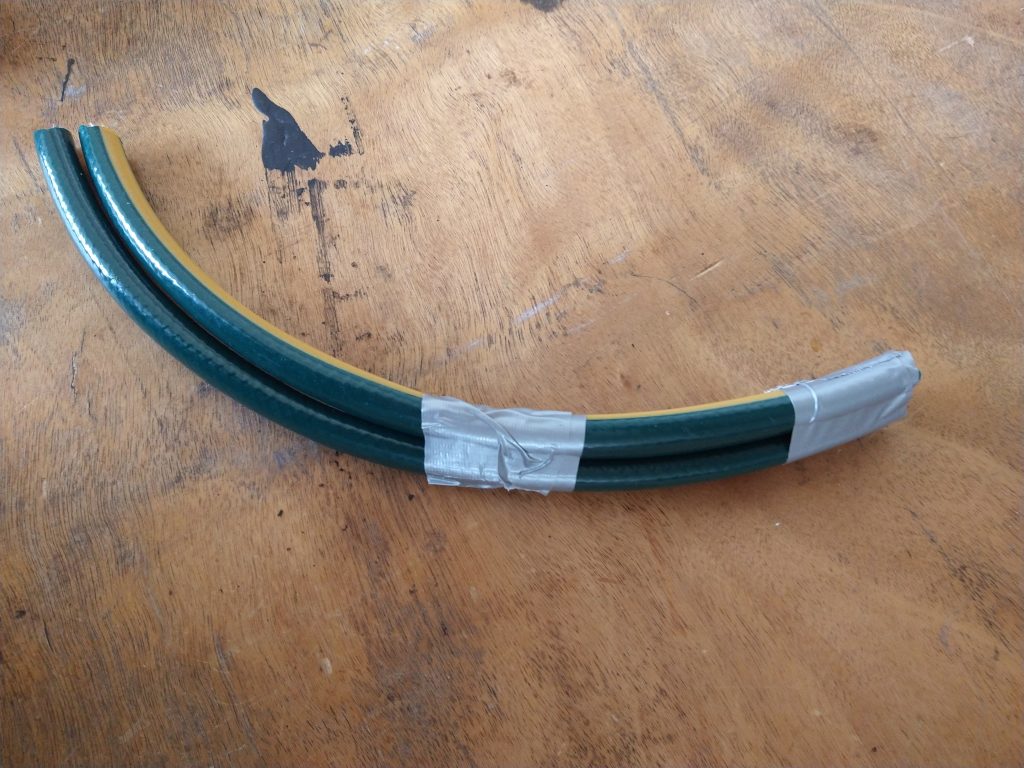
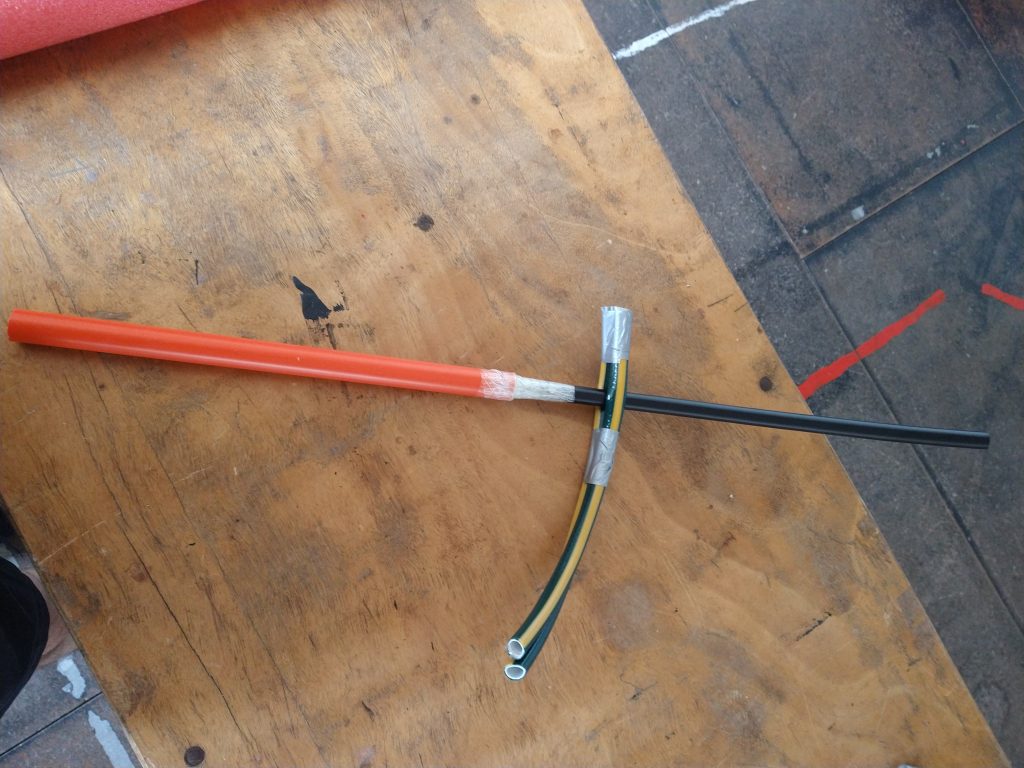
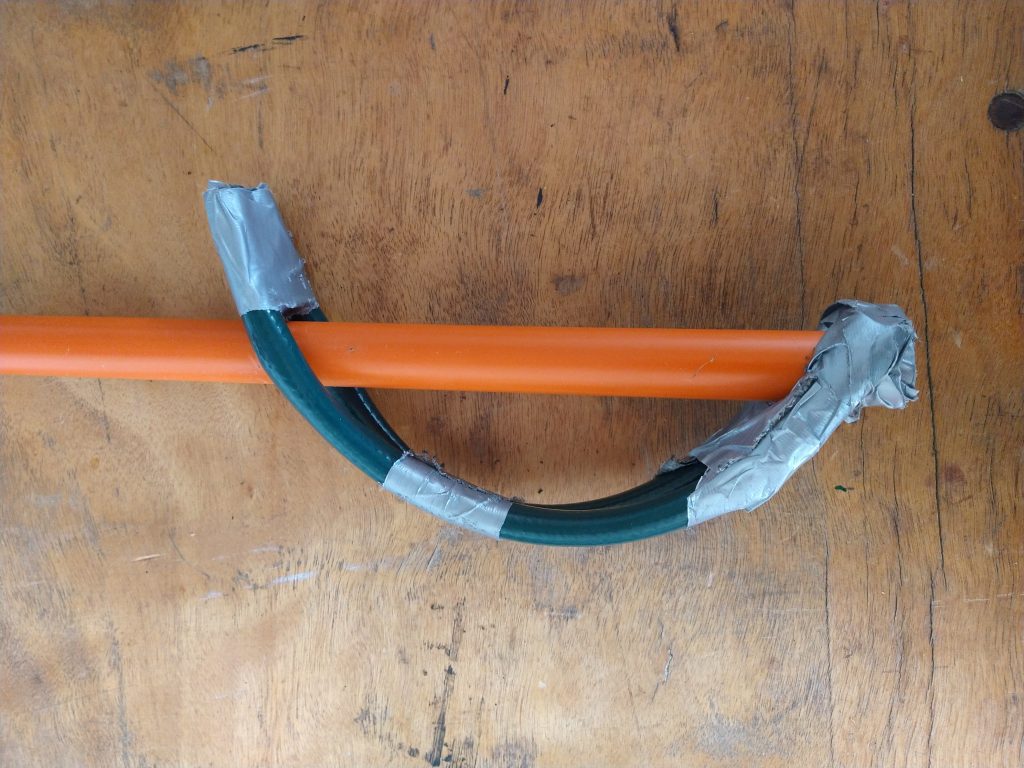
Hold the two pieces of hose alongside each other and tape around them both at the end. Then tape around the hose pieces approximately 5 cm in from the first piece of tape. The hose will become the guard of the sabre. Slide the PEX pipe into the gap between the two pieces of garden hose – this can be tricky and you will have to hold the hose pieces apart to get it in initially. Slide the guard down until it is in the correct place to form the top of the guard on the electrical conduit – approximately 17 cm from the conduit end. Fold the un-taped ends of the garden hose down to the bottom of the handle and tape them to the handle. Tape the guard and the conduit together at the other end of the hose. Now you have a handle, guard and core all together and ready to go.
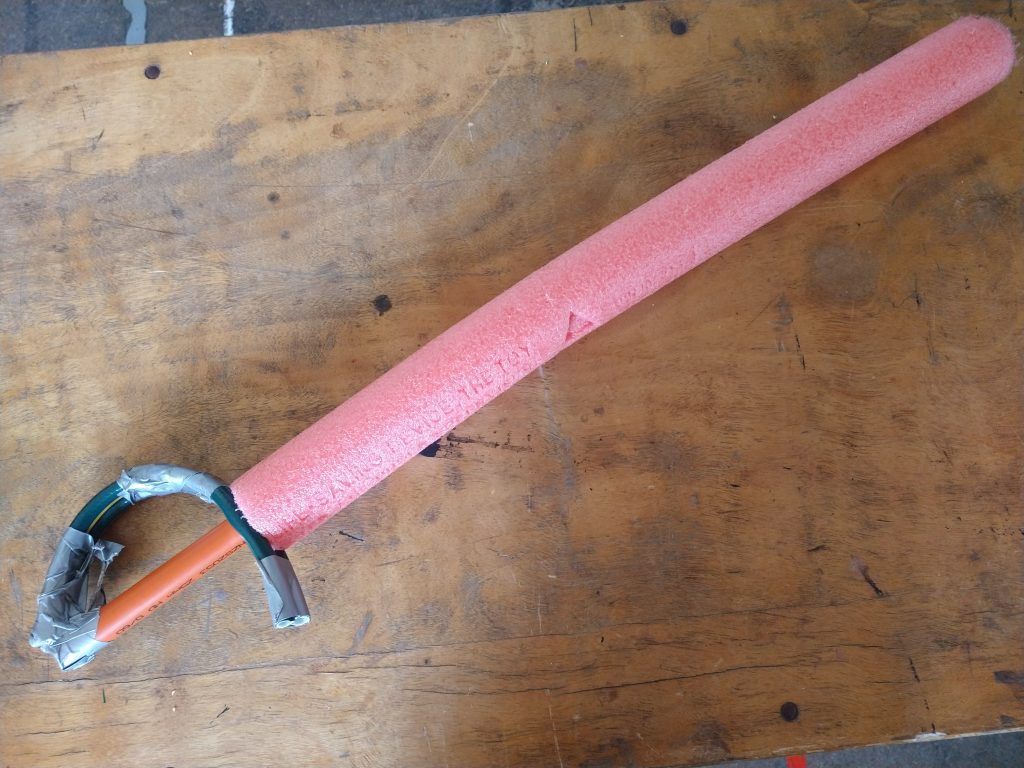
Check the lengths are correct and the PEX pipe finishes 5-10 cm before the end of the pool noodle. Then slide the pool noodle down until it reaches the guard and tape it on. At this point you have a usable foam sabre – you can leave it here or if you wish follow the next step.
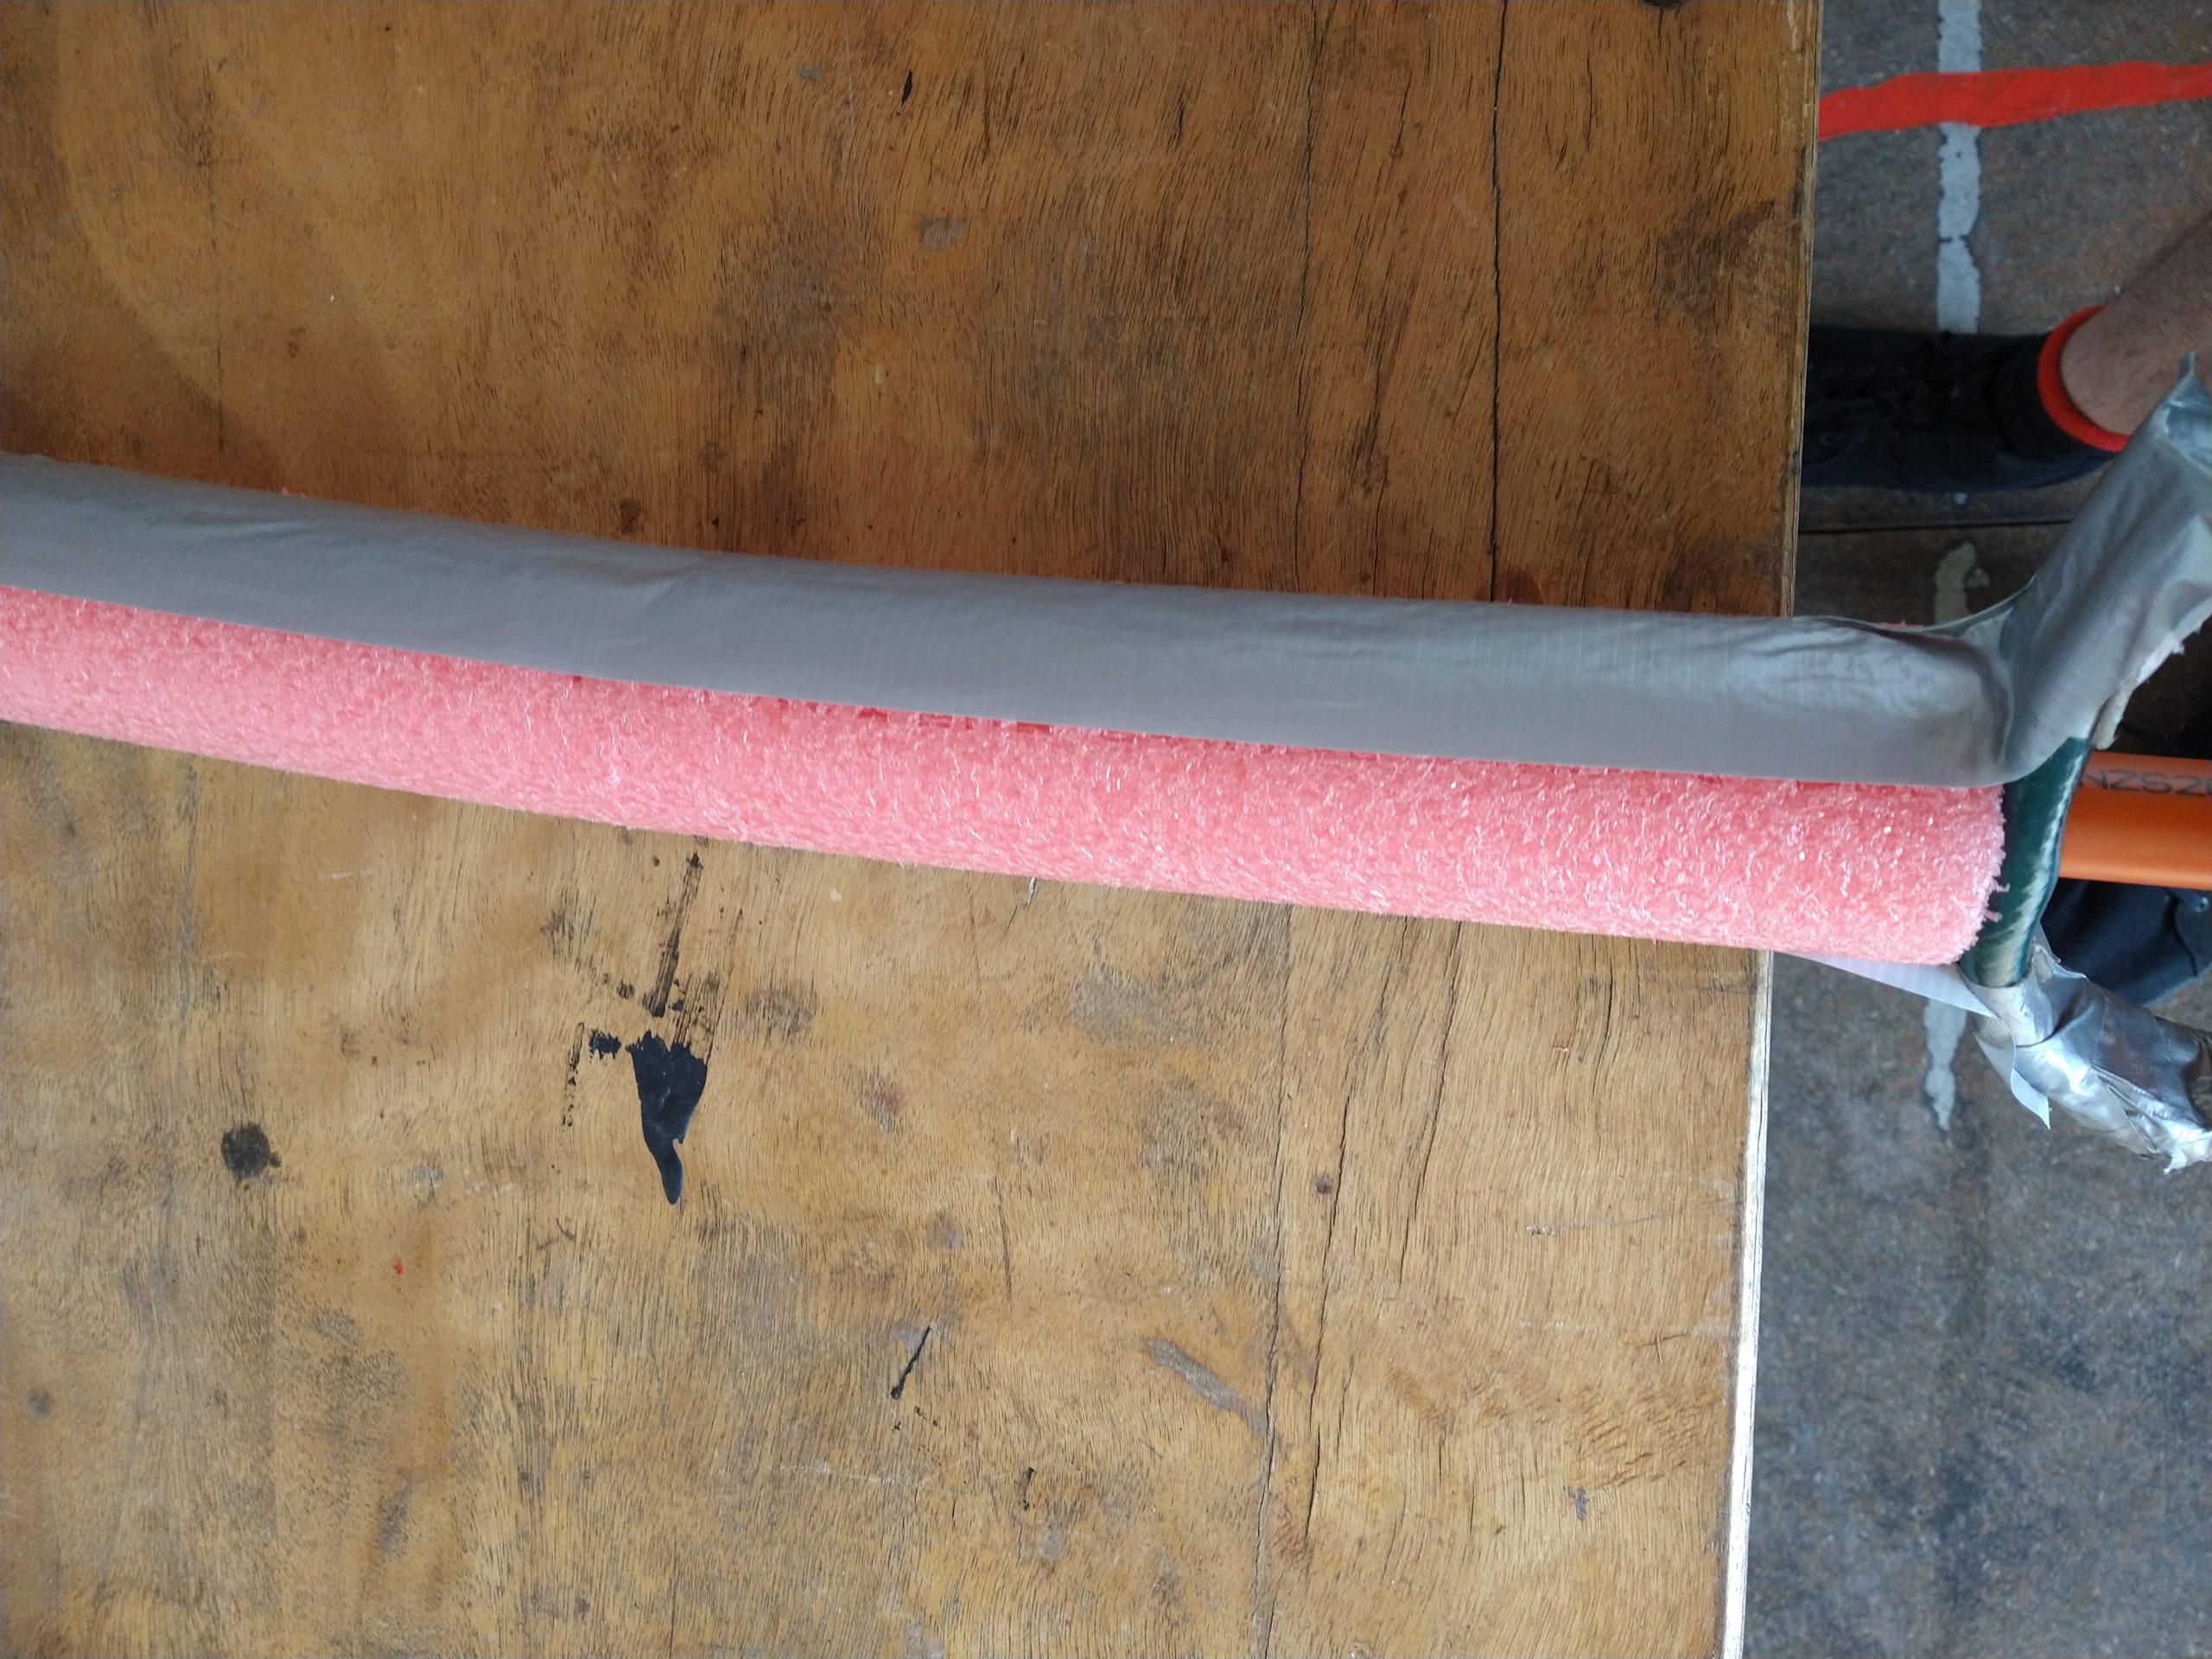
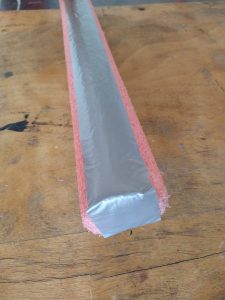
Cover the outside of the pool noodle with fibre tape or cloth tape to help it last longer, without breaking or leaving bits of pool noodle everywhere. Be careful if adding tape it’s easy to add too much making the boffer too heavy. You also want to be careful to apply the tape loosely in straight strips – if you apply it tightly especially in spirals you will compress the foam and end up with a boffer that is too hard.
Done!
Considerations for modifying/adjusting the design
The lengths and sizes given are optimised to use the standard length of a pool noodle in Australia (1.5 m) – for a single handed boffer for adults a blade anywhere between 70 cm and 90 cm would be fine. To adjust the lengths for the other parts to match I mentally divide the blade in thirds: the strong with a rigid electrical conduit core, the middle with a PEX pipe core that has some tape on it making it stiffer, and the weak which has a PEX pipe core that finishes 5 to 10 cm before the tip. It’s easy to use this general design to make two handed boffers, spear heads, pretty much any kind of edged weapon can be bofferized.
Even then I suggest making the stirrup sabre version first, because it is the best for actually using.
Leave a Reply